Adding and Editing Classes
Scenario:
You wish to create one or more supplemental groups so that you can differentiate instruction from the general course progression. Or, you teach in a school/district where Speak Agent is not yet integrated with your Student Information System.
NOTE: Most school districts are set up to automatically roster, so in this case please contact support if your students are not showing up in the right class section.
Steps for Adding a Class:
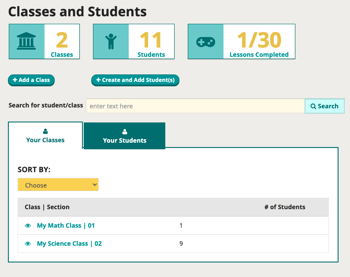
- Click Classes & Students in the left-side menu.

- In a typical implementation, you will have your class sections displaying in the table like so:
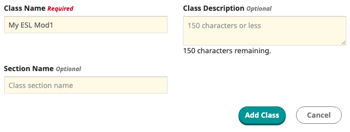
- Press the +Add a Class button to create a new class section or supplemental group.
- A dialog pops up. Just enter a class name that will differentiate the class/group from your other classes/groups and press Add Class.
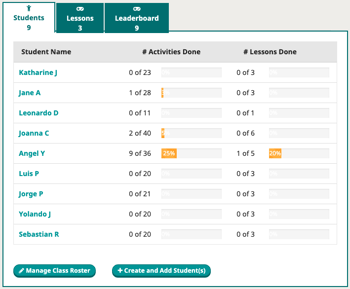
- The new class will be added to your class list. Click the new class name to view the details. The class is empty when you first create it.
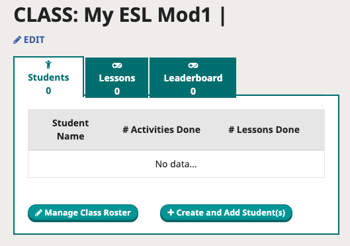
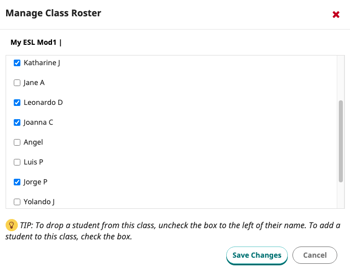
- Press Manage Class Roster to add existing students to the class. Check the boxes for students you want in this class. Students can be in two classes at once. (In this case they will receive assignments from both classes — be aware of that!) You can search the roster in this dialog using Ctrl+F (on a PC) or Cmd+F (on a Mac).
- Press Create and Add Students to add a student who is not yet in the database.
- You can click any class to see the current student roster and progress toward completion of assignments.
 Mission accomplished!
