Troubleshooting Voice Recording
Scenario
A student is not able to record their voice in a Speak Agent activity in a web browser. ![]()
Steps for Fixing a Blocked Microphone
If you see the message below, the mic is blocked by Chrome:
- Click the tuning icon in your Chrome browser bar. See the image below for where to find this icon:

- Press the arrow button
 to show microphone permission details.
- Make sure "Allow every visit" is checked, so that Chrome will not block the microphone next time:

-
Chrome will ask you to reload the page
 and now the mic should record properly! If you still have issues, please contact our support team.
First Time Using Speak Agent on a New Chromebook
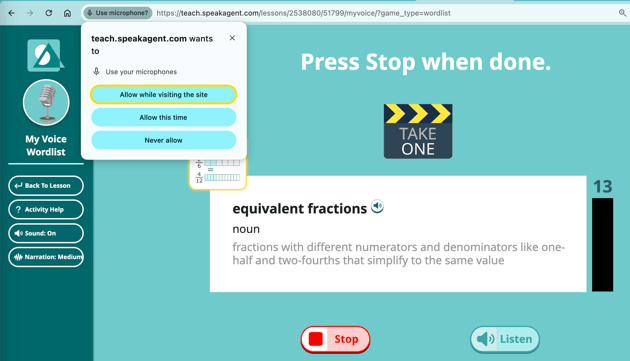
On some devices, the computer may prompt students to allow use of the microphone. If you get this message, please choose "Allow while visiting this site."
![]() Mission accomplished!
Mission accomplished!
