
Scenario:
You wish to assign a Speak Agent lesson to a small group of students.
How It Works
- Click Lessons in the left-side menu.
- Click the title of the lesson you’d like to assign.
- Press the Assign to Student button.
- Press the
 button next to all of the students you’d like to assign the lesson to. This creates a small group will get the lesson assigned to them. Once you press the button, it will turn into a minus sign. In the example below, the lesson will be assigned to Joaquin Santos, Trang Nguyen, Sofia Alvarado, Leah Cortez, etc.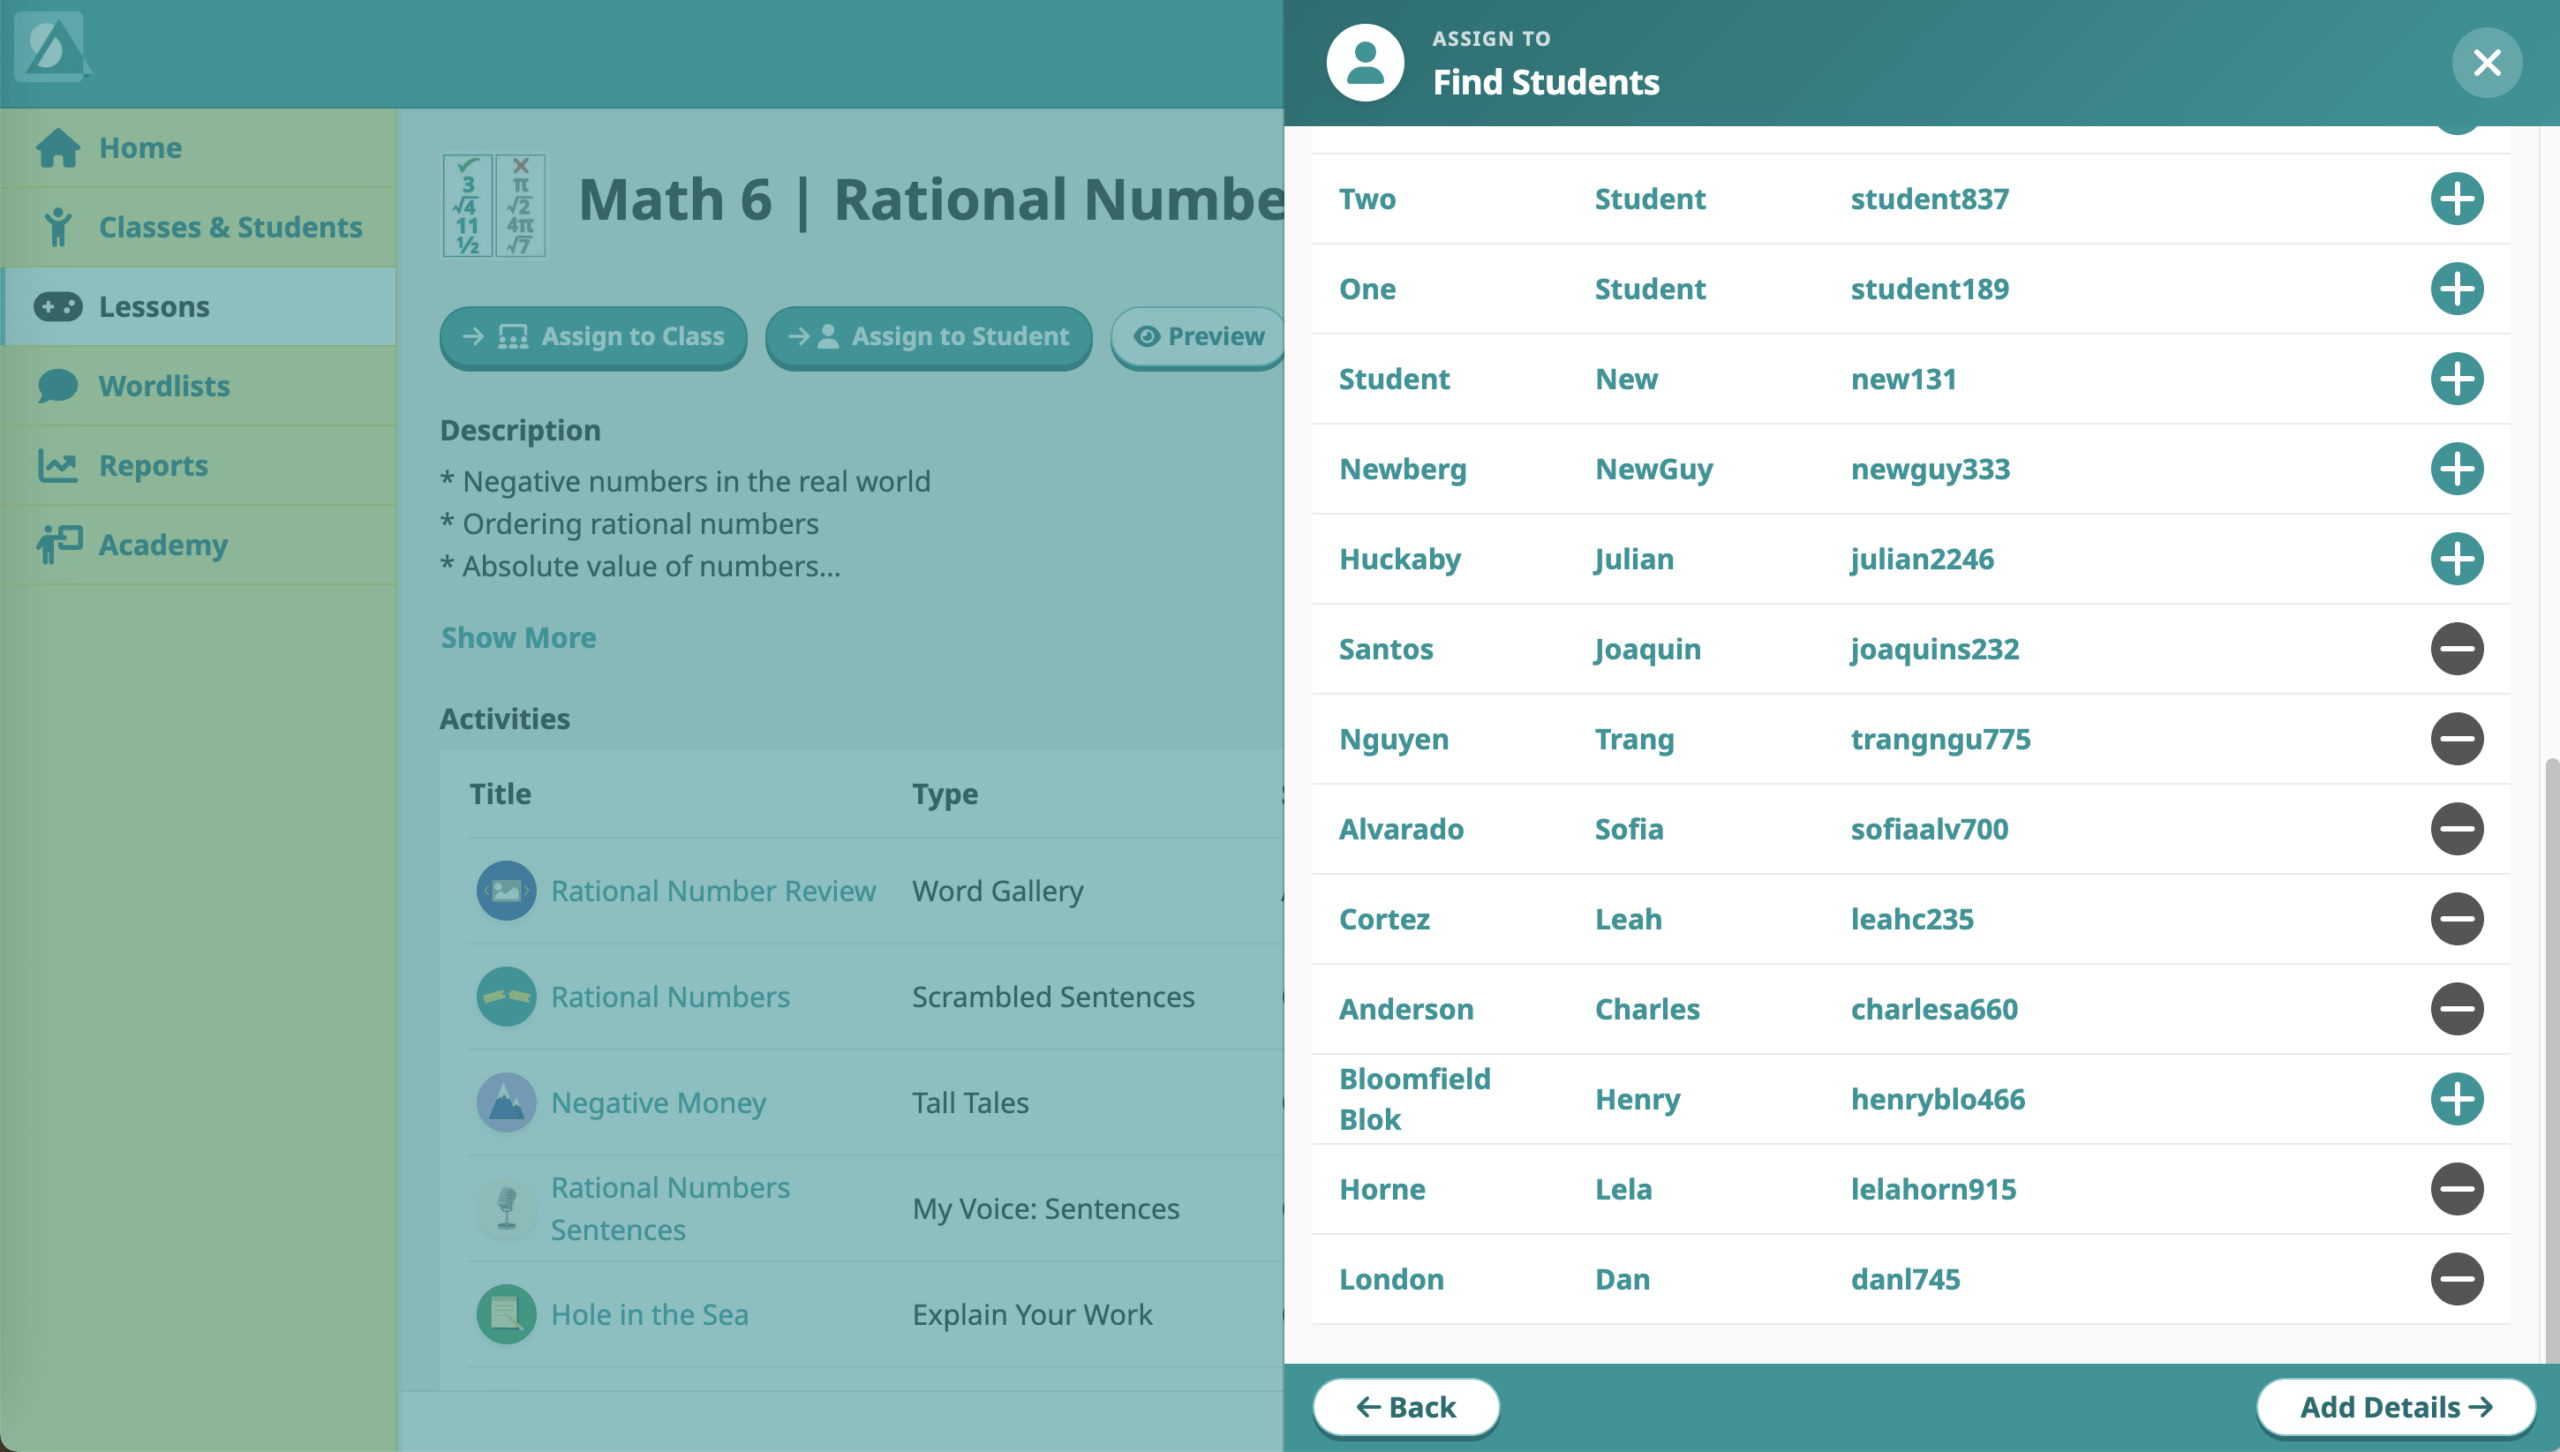
- Click Add Details → on the bottom right.
- Choose a delivery date and a due date (or skip those options). The delivery date determines when students will see the lesson. The due date is when they must complete it. (They won’t be locked out and can complete it late, but you will be able to see that they were overdue.)
- Uncheck any activities that you wish to make optional. If you make an activity optional, your students will be able to complete the lesson without doing that activity.
- Press Confirm Details and make sure everything looks right.
- Once you press Assign, the selected students will see the lesson appear on their Speak Agent home page, as soon as your Delivery Date and time are reached.
How Do I Use Speak Agent with a Small Group?
Many of the activities (see our Teacher’s Guide) work well with a partner. Or, if you’d like to use a blended model, we offer several examples of small group strategies that combine digital work in Speak Agent with group discussion or pencil-and-paper work. Please see this guide: Small Group Strategies Guide for Math

Mission accomplished!